
SELECT YOUR LANGUAGE
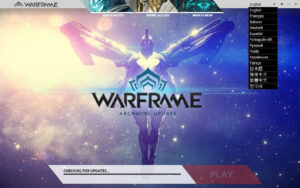
When you launch Warframe for the first time, the game will check for updates through the launcher. You can open the Language drop-down list in the upper-right corner to specify the language you want Warframe to run in. Choosing the right option will switch the in-game text to your native language!
Please select your warframe

After the intro cinematic, you can choose from three warframes. Your warframe acts as a kind of exo-armor suit that protects you from enemies and gives you unique power. Choose wisely, as the warframe you choose will have a big impact on the first few missions! please do not worry. This choice is not final. Over time, you can build or buy additional warframes to master!

The attracting magnetic force attracts enemies to you, stuns them, and brings them into close combat range.
Magnetize Creates a magnetic field around the target, trapping nearby enemies and damaging them over time. This field increases damage in response to bullets and debris created by Polarize.
It emits pulses of polarization energy, exhausting enemy shields and armor, and when combined with magnetization creates deadly debris. The shield of the fellow attacked by the pulse is restored.

Smash magnetizes nearby enemy bones and causes them to collapse with each other.
These robust warframes are very helpful in completing missions while performing feats. Remember that you can choose another warframe to try different playstyles and try new powers.
YOUR FIRST MISSION

The first mission will explain the various basic game mechanics and the selection of the first device. As with choosing warframe, these choices are not permanent. Find over 100 different weapons and add them to your weapons.
Choose a weapon

Melee weapons allow you to perform special stealth attacks on enemies who do not know you are. If you can perform a stealth attack on the enemy, a special context action will be available (default: E). Stealth attacks do a lot of damage and kill weak enemies with a single hit. Eliminating stealth enemies before they alert you will make your mission easier for you.

Sukana is a well-balanced weapon with a fast attack speed.
Mk-1 Bo performs a wide range of slow attacks that can attack multiple enemies at once.
Choose a secondary weapon

The handgun may not be as powerful as the main weapon, but it has a separate ammo pool and can be used if you fall to the ground near death. With proper modification, your secondary weapon can be the worst weapon you have at your disposal!

Rats are moderately damaging pistols, but they are very accurate due to their low recoil.
The quiet kunai moves in an arc when thrown, allowing you to hide your enemies without sounding an alarm.
Select the primary weapon

Your last choice will be your primary weapon. With your primary weapon, your equipment will be perfect. Try a weapon that covers the flaws of other weapons so that you can handle most of the situations you encounter.
The Mk-1 Braton is an excellent assault rifle that can fire quickly and accurately over almost any range.

Paris is a bow, not a weapon like it used to be. Great for defeating enemies without hearing. Before firing, hold down the firing button to do as much damage as possible.
Loot container

Lockers and other loot containers may appear on missions and contain supplies useful for your current mission, such as warframe health and energy, and weapon ammo. You can also include utility items between missions, such as credits for purchasing new items and resources for building items in the foundry. Lockers can be opened (default: X), but other containers must be destroyed with weapons to plunder their contents.
Parkour

Freedom of movement in Warframe provides the ability to navigate missions in a variety of ways. Gain innate parkour skills by jumping over obstacles, jumping over huge crevices, and running along walls.
Double Jump-Press Jump twice to make a second jump in the air.
Sliding-Pressing the slide button while running slides the Warframe, allowing you to pass through low-ceiling obstacles that you wouldn’t normally be able to pass by simply running.
Bullet Jump-Jumps as you slide to activate the bullet jump and adds a burst of speed to move in any direction of your choice.
Glide-Aim to jump into the air and slow down your fall, making it easier for your enemies to shoot while controlling how they descend.
Pan-If you hold down the jump button while next to the wall, it will move up or along the surface. Jumping to the wall resets the double jump.
Stop-Point next to the wall and it will be docked to the surface.
Zipline-Press the context action button near the zipline and swing on the line.
ADVANCED MANEUVERS

If you look down while making a melee attack while airborne, your warframe will hit the ground with your weapon. Melee weapons behave differently, but this movement usually kills nearby enemies to the ground.
When gliding in the air, Warframe will perform a kick and knock down the weak enemies it hits.
Enemies knocked on the ground are vulnerable to ground finishers, a special attack that deals bonus damage as well as stealth attacks.
If you block (default: Hold F) with a melee weapon equipped (default: Mouse 2), you will receive a frontal attack and reduce your stamina instead of directly damaging your Warframe. Blocking can be done during various movements such as jumps and slides, but stamina recovery is slower than unblocking Warframe recovery.
If you channel a melee weapon (default: Mouse 1) while equipped, the energy of the warframe will enhance your melee attack. Attacking enemies while channeling will inflict bonus damage, but will consume energy for each successful attack.
Blocking and channeling at the same time makes the enemy stagger when attacked, making them vulnerable to counterattacks that deal bonus damage.
HACK

Purchaseable crypters complete the hack instantly. This is useful if you need to hack your device when an enemy is nearby. To complete the hack using one of the cryptographic features, select the Use Cryptographic Features button.
Purchaseable crypters complete the hack instantly. This is useful if you need to hack your device when an enemy is nearby. To complete the hack using one of the cryptographic features, select the Use Cryptographic Features button.
Your ship, LISET

After completing the first mission, you will be on a private ship that will be the starting point for the mission. Initially the required segments are missing, but they will be available after completing the tutorial missions.
In the Arsenal segment, you can change equipment as you get additional weapons and Warframes. You can also change the look of your Warframe and weapons by equipping them with cosmetics and changing their colors.

As your weapons and Warframes level up as you use them, you’ll be able to use more powerful mods. As you level up, your basic warframe stats will also increase.
You can buy Warframes, weapons, cosmetics, blueprints, consumables and other items at the shop. Blueprints can usually be purchased for credit, but platinum is required to purchase other items.

In some cases, you can buy items at a lower price on sale, and packaging can save you multiple items at once.
The mission is selected in the navigation console. The readings indicate the enemy factions present in the mission and their average level, and help determine if you are ready to face the mission. More missions will be available when you complete a mission that has already been unlocked.
You can also check the top right corner of the navigation screen to see the foundry resources that exist at that location.
At the mod station, you can sell unwanted mods or convert them to new mods. You can also use the remaining mods to increase the power of the mods you use most.
At the mod station, you can sell unwanted mods or convert them to new mods. You can also use the remaining mods to increase the power of the mods you use most.

Foundry allows you to create items from the retrieved blueprints. Once you’ve collected the resources, it will take some time before you can use the item, but you can start building.
Some plans make multiple copies of the same object at the same time. This will help you create consumables that you use regularly in your mission.

MODDING

Play Warframe and you’ll receive many valuable resources to help you defeat more difficult enemies. Mods play a major role in giving power enhancements and customizations to weapons and Warframes. The effect in battle depends greatly on the mod you are equipped with.
Each mod equipped deprives you of upgrade abilities-a cap that naturally increases as your Warframe or weapon level up.

Mod Polarity-Each mod has a unique polarity that appears in the upper right corner. Matching this polarity to the same polarity in the weapon and Warframe mod slots will halve the capacity used by the mod, but equipping the mod with a non-matching polarity will double the cost.
Aura Mods-These mods can only be equipped on Warframes and provide passive effects that benefit the entire unit. Matching the polarities of the aura also increases the total capacity of the warframe.
Guard Mods-These mods can only be equipped on melee weapons, allowing unique combo attacks when equipping this weapon in combat. Guard mods also increase the total capacity of the weapon if equipped with similar polarities.
Form Form blueprints can be obtained from missions as rewards and are used to change the polarity of weapons or Warframe slots. Please note that using the form will also reset the weapon or Warframe level out of rank.
CHANGE YOUR MISSION STATUS
By default, the mission status is PUBLIC. That is, other players can join missions to help you and access other players’ missions to complete them.

You can change the status of your mission by selecting the Matchmaking drop-down menu or using the navigation map. If set as “Friends Only”, only players in the Friends List can participate, and if set as “Guests Only”, only players invited to the game can participate. To meet new friends and discover other powers of squad members, we recommend playing in public mode!
MISSION INTERFACE

1: Lotus will contact you regularly throughout the mission. Hear it and it can save your life!
2: Minimaps help you navigate where missions take place. Tracking the target with the red symbol will take you to the mission’s purpose. Teammates will appear on the map as a blue lotus symbol. Being together will maximize your experience.
3: Warframe measurements show important information you need to stay alive. The shield, indicated by the large blue number, will regenerate over time. When the shield is exhausted, you lose your health, as indicated by the large red numbers. The current rank of a warframe is indicated by the number next to the name of the warframe. Your current experience level is represented by a white bar, which fills up as the warframe approaches rank up.
4: Weapon readings show important information about the equipped weapon. Similar to reading a warframe, the current rank of a weapon is indicated by the number next to the weapon name. Your current experience level is represented by a white bar, which fills up as you approach the rank of your weapon. Look at the maximum ammo counter on the right and replenish the ammo you find during the mission.
5: Warframe abilities are displayed here. The currently selected skill is highlighted in blue. Other abilities are blank or grayed out if there is no energy to activate.
6: Use the chat window to communicate with other players on missions and track online or offline users.
7: If the target reticle points to an enemy, its health and description will be displayed. If the enemy’s health is blue, you have a warframe-like regeneration shield!
8: Challenges will be displayed during the mission. If you manage to complete the challenge, you’ll get a warframe affinity bonus!
9: Credits, casting materials, mods and affinities found during the mission are displayed here.
10: In missions, you can find mods that you can use to upgrade your weapons and warframes. Once collected, it will be displayed here with a description of the effect.
Move: Use W to move forward, S to move backward, and A and D keys to move left or right. Alternatively, you can use the directional arrow.
Run: Press the Shift key on your keyboard to run warframe.
Jump: Press the space bar on your keyboard to jump.
Crouch: Hold down CTRL on your keyboard and crouch. Press V to switch between crouching and standing.
Shoot: You can shoot with the left mouse button.
Purpose: Zoom in and right-click with the mouse to aim at the weapon.
Mark: Press the G key to place a marker that other players will follow.
Swap Weapons: Use the F key to switch between primary and secondary weapons. Hold down to equip melee weapons and perform advanced movements.
Melee: Use the melee weapon with the E key.
Use Skills: Allows you to activate selected skills with mouse3. You can also press the 1, 2, 3, or 4 keys to cast a particular ability.
Change Selected Skill: Allows you to activate the selected skill with mouse3. You can also press the 1, 2, 3, or 4 keys to cast a particular ability.
Context Action: When the context action symbol is displayed, you can press the X key to execute it.
You can access the chat window by pressing T during a chat mission.
PC CONTROLLERS
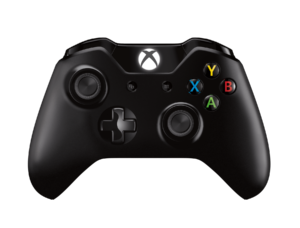
1: Use the left stick to move the warframe.
2: Press and hold the left stick to run.
3: The camera is controlled by moving the right joystick.
4: Not linked
5: Press the A button to jump the warframe.
6: Press the B button to perform a melee attack. With melee guards, you can use B to start a combo.
7: The X button reloads the weapon and allows you to perform contextual actions such as opening lockers or reviving players.
8: Press the Y button to switch between the primary and secondary weapons. Press and hold to equip melee weapons.
9: Crosshead left / right scrolls warframe power. Press on the crosshead to create a waypoint marker. Press Down to toggle between inventory and gesture menus.
10: Press the left buffer to crouch. You can push up while walking to roll the push-ups, and press the left buffer while running to slide.
11: Hold down the left trigger with your main or secondary weapon to aim. Holding the left trigger with a melee trigger activates channeling.
12: Press the buffer on the right to open the power menu.
13: If equipped with a melee trigger, pressing the right trigger will fire the equipped primary or secondary weapon or block the attack.
FALL IN COMBAT
When your health reaches zero, you will be injured and fall to the ground. While down, you will no longer be able to use your abilities and your main and melee weapons will be disabled. You can protect yourself with secondary weapons, but this is not always the best idea, as enemies can attack and accelerate bleeding rates. Sometimes it’s better to wait for help unnoticed. If your teammates can’t contact you before you bleed, you’ll be helpless.

When teammates fall into battle, the Lotus icon will be replaced by a red cross icon on the minimap, and their names will be visible through the red obstacles to help rescue them! If you are deprived of your abilities, you will not be able to continue participating in the mission unless you are revived (although you can observe and talk to your teammates in spectator mode). When the bleed timer reaches zero, the Warframe is discarded. Fortunately, every warframe has an amazing ability to revive itself during a mission. You can use this feature to go back into battle and help your friends!
If you choose not to revive in a mission, the warframe will not be destroyed and will survive playing other missions. Knowing when to come back and when it’s worth losing a mission is part of Warframe’s play! You will receive 4 revives per mission, which will be restored as soon as you return to the ship.


